Showing posts with label cheap. Show all posts

Tuesday, April 5, 2011

Skillet Rosemary Chicken


This. Was. Amazing. The chicken was so moist and juicy. And flavorful! The lemon rosemary flavor was perfect. And along with the crispy, flavorful skin, YUM.

And the potatoes were great too! They absorbed a lot of the flavor, were soft but not mushy, and some had a nice crisp side without being burned. The only change I would make next time is to specifically salt the potatoes after boiling but before putting with the chicken because they needed more salt than the rest of the dish (not a big deal, I just salted the potatoes on my plate).

Oh, and if any of you are counting along at home, including the potatoes and crispy chicken skin, this meal is only around 415 calories. We added asparagus to that, and we were set.
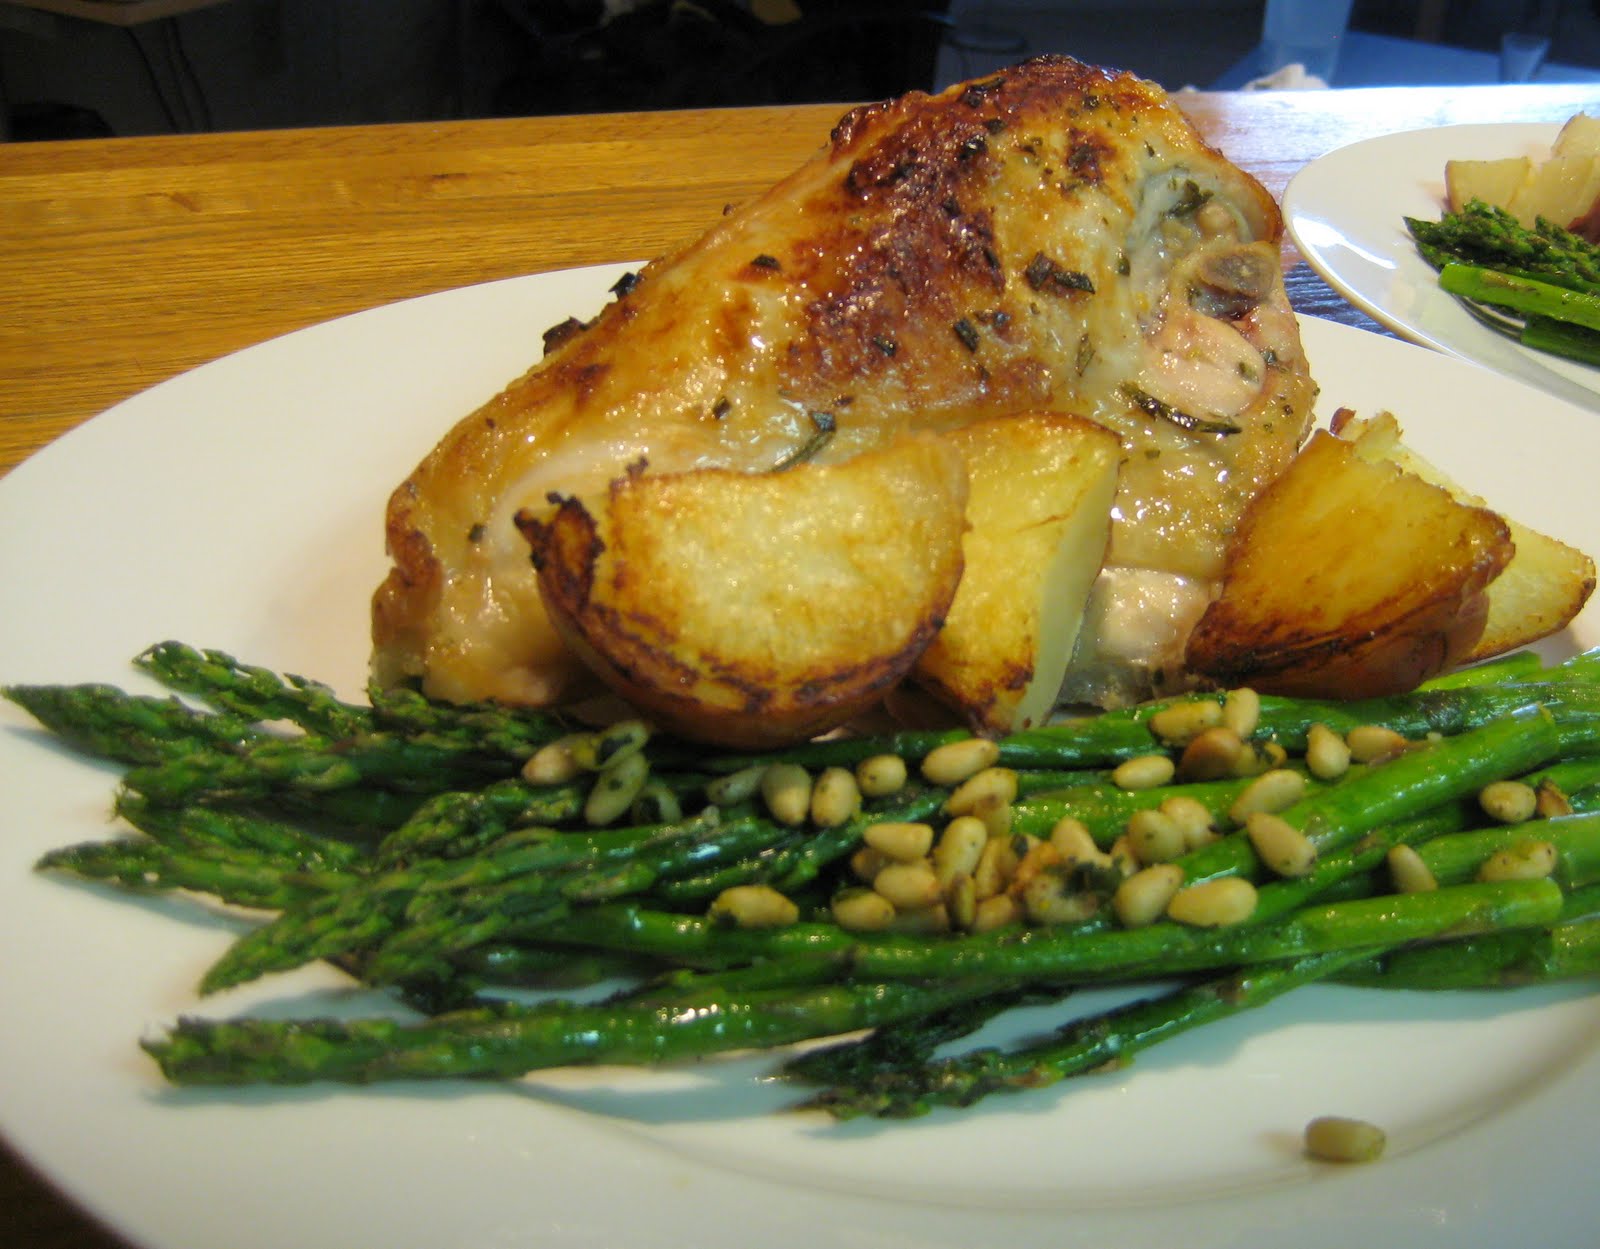
"Skillet" Rosemary Chicken
adapted from Food Network Magazine
Serves 4


Ingredients
  • 3/4 pound small red-skinned potatoes, halved, or quartered if large (for me this was only 4 potatoes)
  • Kosher salt
  • 2 sprigs fresh rosemary, plus 1 tablespoon leaves
  • 1 clove garlic, smashed
  • Pinch of red pepper flakes
  • Juice of 2 lemons (squeezed halves reserved)
  • 2 tablespoons extra-virgin olive oil
  • 4 skin-on, bone-in chicken breasts (6 to 8 ounces each)

Directions

Preheat the oven to 450. Cover the potatoes with cold water in a saucepan and salt the water. Bring to a boil over medium-high heat and cook until tender, about 8 minutes; drain and set aside.

Pile the rosemary leaves, garlic, 2 teaspoons salt and the red pepper flakes on a cutting board, then mince and mash into a paste using a large knife. *note- this cannot be done in a food processor- I tried* Transfer the paste to a bowl. Stir in the juice of 1 lemon and the olive oil. Add

the chicken and turn to coat.

Heat a large cast-iron skillet over medium-high heat. Add the chicken, skin-side down, cover and cook until the skin browns, about 5 minutes. Turn the chicken; add the potatoes to the skillet and drizzle with the juice of the remaining lemon.*If you do not have an oven safe skillet, Instead of turning, move to a cookie sheet covered in aluminum foil. and continue as directed.

Add the rosemary sprigs and the squeezed lemon halves to the skillet/cookie sheet; transfer to the oven and roast, uncovered, until the chicken is cooked through and the skin is crisp, 20 to 25 minutes.

Wednesday, September 15, 2010

Summer Vegetable Pasta

Nothing screams summer like an abundance of zucchini, squash and basil. Put them to good use in this quick and easy pasta dish.
2 Tips for this recipe:
1. SEASON IT- this one needs salt and pepper. Do NOT skimp on the seasonings. Also, use real basil in this one, not those tubes of the chopped stuff. That works for some recipes, but not this one.
2. I make leftovers to bring to lunch. If you do so as well, do not reheat this dish. Eat it chilled and do not microwave. It ruins the consistency/texture.

Summer Vegetable Pasta
  • 1 pound corkscrew pasta, such as rotini
  • 1/6 cup extra-virgin olive oil
  • 4 cloves garlic, finely chopped
  • 1/2 cup Italian-style breadcrumbs
  • 2 zucchini, thinly sliced in 1/2 moons
  • 1 yellow squash, thinly sliced in 1/2 moons
  • 4 ears corn, kernels scraped off
  • 6 ounces Swiss cheese, shredded
  • Salt and pepper
  • 1/4 cup finely chopped fresh basil


Directions:

  1. In a large pot of boiling, salted water, cook the pasta until al dente. Drain, reserving 1 cup of the pasta cooking water and the pot.

  2. Meanwhile, in a small skillet, heat 2 tablespoons olive oil over medium heat. Add half of the garlic and cook until golden, about 30 seconds. Stir in the breadcrumbs and remove from the heat.

  3. In the reserved pasta pot, heat the remaining 2 tablespoons olive oil over medium heat. Add the remaining garlic and cook until golden, about 30 seconds; add the zucchini and squash and cook, turning occasionally, until crisp-tender, about 5 minutes. Stir in the corn, cooked pasta and as much of the reserved cup pasta cooking water as you like (I usually use about 1/2 cup). Add 1 cup cheese and toss; season with salt and pepper.

  4. Stir the remaining cheese and the basil into the breadcrumb mixture and sprinkle on top of the pasta.

Beans and Pasta

I have meant to post this recipe for ages. I have made it...I don't even know how many times! It's really tasty, easy and filling, as well as pretty healthy. Nowadays the Boy and I are trying to reduce our meat intake, so this bean filled, vegetarian dish is perfect.

2 cups Bowtie pasta

1 Tbsp olive oil

2 medium carrots, diced

1 large onion, chopped

2 cloves garlic, chopped

1 tsp basil

1 tsp rosemary

1 tsp oregano

1 (28 oz) can diced tomatoes, undrained

1 (19 oz) can kidney beans, drained and rinsed

1 (19 oz) can chickpeas, drained and rinsed

Parmesan cheese to serve

Directions

1. Cook until tender but firm. Drain.

2. Heat oil over medium heat in a large deep skillet.

3. Add carrots, onion and garlic to skillet. Cook until tender.

4. Add spices and tomatoes to skillet. Bring to a boil.

5. Add beans to skillet.

6. Add cooked pasta to skillet. Simmer gently for 2 minutes. Serve in soup bowls. Sprinkle with Parmesan cheese.


Sunday, April 18, 2010

Turkey Tetrazzini

Back in late October I hosted a pre-Thanksgiving supper club dinner. Because I hosted, I made the entree, a turkey breast. A whole, bone in turkey breast. For 4 girls. To say I had leftovers is an understatement. I found this recipe on AllRecipes and tweaked it to my liking. LOVED IT.
After Christmas, my mom was asking if I had any recipes for leftover turkey, and I told her about having made this with the leftover supper club turkey. She loved the idea, so we made it, and she, too loved it.
Now I bring the recipe to you in case you ever find yourself with so much leftover turkey and no clue what to do with it. It makes a sort of turkey casserole. The sauce for it is great though, so much better than some canned "cream of" soup as a base. I would even recommend trying the sauce for tuna noodle casserole as a way to avoid the canned soup base. Much yummier (and probably a LOT less sodium too).

Each time I have made this I halved in and baked in a 9" round cake pan or an 8x8 cake pan. If you make the whole recipe, use a 9x13 pan I think. The entire recipe should make about 6-8 servings.

Turkey Tetrazzini

Ingredients
  • 1 package uncooked rotini
  • 1/2 cup butter
  • 1 tsp minced garlic
  • dried parsley, basil and oregano to taste
  • pepper to taste
  • 1/2 cup all-purpose flour
  • 3 cups chicken broth
  • 2 cups milk
  • 1 2/3 cups grated Parmesan cheese
  • 4 cups chopped cooked turkey
  • 1/2 cup bread crumbs
Directions
  1. Preheat oven to 350 degrees F . Lightly grease a medium baking dish.
  2. Bring a large pot of lightly salted water to a boil. Add rotini, and cook until al dente. Drain, and place in the prepared baking dish. Add turkey.
  3. Melt butter with garlic, pepper and parsley/oregano/basil in a medium saucepan over medium heat. Stir in flour and cook, stirring constantly for a minute or so until a thick roux forms. Mix in chicken broth and milk. Cook and stir until the mixture comes to a boil. Stir in about 1 1/3 cups Parmesan cheese, and remove from heat.
  4. Mix chicken broth mixture (to taste: I used about 1/2 of it, but other people prefer theirs saucier and should use more) with rotini and turkey. Top with remaining cheese and breadcrumbs. Bake 1 hour in the preheated oven, until surface is lightly browned.

Swiss Apple Grilled Cheeses

As I previously mentioned, I hosted a friend's birthday a while back and made various snacks, including these Swiss Apple Grilled Cheese triangles. My friend said it tasted like her favorite fondue (swiss with apples, who would have thought?!) Basically, very good.
I have made these like regular grilled cheese in a pan (with olive oil instead of butter) and in a panini press without any oil, and I think I liked the panini press better, but you can certainly make them as you would make a regular grilled cheese.
Grilled Apple Swiss Cheese

Ingredients
2 slices whole wheat bread
1/4 Granny Smith apple - cored and sliced
1/3 cup shredded Swiss cheese

Directions
Preheat the panini press to medium heat. Place 1 slice of bread onto the press, and arrange the apple slices evenly over the top. Sprinkle the Swiss cheese over the apple, then top with the remaining slice of bread. Cook until the bread is golden brown and the cheese is melted, 1 to 2 minutes. Cut into diagonal qurters for finger food.
Posted by Picasa

Monday, February 15, 2010

Baked Crab Rangoons


Happy Valentine's day to all. Or in my case, a Happy "Girls Night In" Day. The boy will be back in a bit, but for tonight I was without him, so I used the opportunity to make a thank you dinner for one of my single gal pals. Did I just say "gal pals"? Forgive me, must be the strawberry margaritas speaking.
Anyway, I made a 3 course thank you dinner. It started with these baked crab rangoons. Followed by a Chinese chicken salad with a home made sesame soy dressing and ending with a brookie (brownie cookie, aka cookie in a brownie). While all parts were good, I think the crab rangoons were best. I made 13 rangoons and the 2 of us ate every last one.
These guys are SO easy too. Mix, place in won tons in muffin cups, bake. Done.

I was really afraid that these would be really gross once I opened the can of crab meat. I have never used canned crabmeat before, so I was shocked to open it and find that it smelled a little like canned tuna. Not what you want in your crab rangoon. After I drained it and mixed it with the other ingredients though, it tasted nothing like that smell, and was really good. Just make sure to drain it.

Also, I think this is a great base recipe for a crab dip. Add old bay, maybe replace the green onion with regular onion, add some cheese and bake in a casserole dish and it should be great. Just a thought from a girl who loves crab dip a little too much (what can I say, I am always a Marylander at heart).Baked Crab Rangoons

Ingredients

  • 1 (170 gram) can crabmeat- drained well
  • 125 grams (a little more than 1/2 package) Brick of Cream Cheese, softened
  • 1/4 cup thinly sliced green onions
  • 1/4 cup Mayo (I used the olive oil based mayo as it is all I buy nowadays)
  • 12 wonton wrappers
  • Optional: Sesame seeds and/or green onions for garnish

Directions

  1. Heat oven to 350 degrees F. Mix crabmeat, cream cheese, onions and mayo.
  2. Spray 12 muffin cups with cooking spray (not too heavily). Gently place 1 won ton wrapper in each cup, allowing edges of wrappers to extend above sides of cups. (I realized it is best not to try to bend the middle parts onto themselves to make it flat, let the insides be bumpy, it firms up better) Fill evenly with crabmeat mixture.
  3. Bake 18 to 20 min. or until edges are golden brown and filling is heated through. (I then placed them on paper towels for a few minutes to absorb the extra oil and firm up) Serve warm. Garnish with chopped green onions and sesame seeds, if desired.

Sunday, January 24, 2010

We'll call them Franken-Muffins

I found this GREAT post a while ago on tastespotting. It was a basic muffin formula that you adapt for whatever type of muffin you wanted to make, and it gave some suggestions for combinations. But really, give me time to peruse the grocery store and I can come up with my own combination rather easily. And that's just what I did. Introducing, the delicious and rather healthy Franken-muffin. OK, so the name may not work, but my combination of ingredients did!
Here is MY Version:
Dry ingredients
2 cups all-purpose flour
2 tsp baking powder
1 tsp baking soda
1 tsp spice cinnamon
1 tsp ground ginger
1/2 cup dried cranberries
1/2 cup chopped pecans

Wet ingredients
1 cup plain yogurt
1/4 cup vegetable oil
scant 1 cup white sugar
1 egg, beaten
pinch of salt
1 tsp vanilla extract
3/4 cups grated zucchini
3/4 cups grated apple

PROCEDURE
Preheat oven to 375˚F.
Grease a muffin tin (12 count- I needed about 14 muffin cups if they had all been full size, or 12 regular muffins and 12 minis) with grease spray or butter.
Get two big bowls. In the first bowl combine the dry ingredients except the dry muffinhancers.
In the other bowl combine yogurt, sugar, salt, melted butter, egg and extract. Mix it all up until it’s good and smooth. Now mix in both the wet and dry Muffinhancers and stir to distribute.
Make sure your oven is set and the muffin tin is greased up before you combine the wet and dry. It’ll need to happen pretty quickly.
Pour the dry mix into the wet bowl and fold gently with a spatula while you count slowly to 15-20. The result should be a very lumpy batter, with frequent dry floury spots. It’s better if it’s not a smooth batter.
Now use an ice-cream scoop or just a big spoon to fill the muffin tray evenly. Fill it up almost to the top of the tray. Bake for 20-25 minutes (about 13 minutes for the minis). When they are done, turn it over onto a clean tea towel to let them cool.

And here is the basic formula:
Dry ingredients
2 cups all-purpose flour
2 tsp baking powder
1 tsp baking soda
2 tsp spice (cinnamon, cloves, cardamom, ground ginger, ground coriander, etc)
1 cup of dry Muffinhancers (can be chopped nuts, dried fruits, toasted coconut, chocolate chips, etc)

Wet ingredients
1 cup plain yogurt
1/4 cup melted butter (or vegetable oil)
1 cup white sugar
1 egg, beaten
pinch of salt
1 tsp vanilla extract
1 ½ cups of wet Muffinhancers (can inc: mashed banana, grated zucchini, grated carrots, grated apple, frozen berries, mango puree, chopped up orange, etc)

PROCEDURE
Preheat oven to 375˚F.
Grease a muffin tin (12 count- I needed about 14 muffin cups if they had all been full size, or 12 regular muffins and 12 minis) with grease spray or butter.
Get two big bowls. In the first bowl combine the dry ingredients except the dry muffinhancers.
In the other bowl combine yogurt, sugar, salt, melted butter, egg and extract. Mix it all up until it’s good and smooth. Now mix in both the wet and dry Muffinhancers and stir to distribute.
Make sure your oven is set and the muffin tin is greased up before you combine the wet and dry. It’ll need to happen pretty quickly.
Pour the dry mix into the wet bowl and fold gently with a spatula while you count slowly to 15-20. The result should be a very lumpy batter, with frequent dry floury spots. It’s better if it’s not a smooth batter.
Now use an ice-cream scoop or just a big spoon to fill the muffin tray evenly. Fill it up almost to the top of the tray.
Bake for 20-25 minutes (about 13 minutes for the minis).
When they are done, turn it over onto a clean tea towel to let them cool.
Posted by Picasa

Sunday, December 13, 2009

Pineapple Upside Down Cake


You know it is finals time when: I randomly decide to poke my head out of my study hole and post.

This summer some friends and I initiated a dinner club. Each month 1 of us would host a dinner, come up with a theme and assign menu items. This was the dessert for out Mexican themed night (more Cal-Mex, but I certainly did not mind!). I was terrified it wouldn't work out and I would be left with a 9x13 pan of ick and no dessert to bring.
Thankfully I was TERRIBLY wrong, and I had a 9x13 pan of deliciousness and a great dessert for my dinner club.Sadly, my dear friend and dinner club peer, Sam, is leaving for the Big Apple, so dinner club will likely fall to the way-side. If anyone in the No.VA area wants in to take her spot, let me know ;)

Pineapple Upside Down Cake
from laughingduckgardens.com
  • canola oil to grease the pan
  • 12 tablespoons (i.e. 1.5 sticks) of unsalted butter (not margarine), soften to room temperature, and divided into 9 T for the caramel/topping and 3 T for the batter
  • 1.5 cups brown sugar
  • 12pineapple rings - about 1-2 15-oz cans pineapple rings in juice (not in syrup)
  • 4oz (1/2 of 8 oz jar) jar maraschino cherries, pitted and stemmed
  • 1/2 cup + 1 Tablespoons of whole milk
  • Skimpy 1/2 cup canola oil
  • 1 teaspoons strong vanilla extract
  • 1.5 cups + 3 tablespoon of all purpose flour
  • 2 teaspoons baking powder
  • 3/4 teaspoon salt
  • Heaping 1 cup sugar
  • 3 eggs

Instructions:

1. Turn oven on to a temperature of 350 F

2. Oil the pan with a pastry brush (or your fingers) using up to 2 tablespoons of the canola oil. Make sure to get the corners and sides well. Do not be stingy as you want the cake to unmold easily. Roughly chop 9 tablespoons of butter and scatter at the bottom of pan. Put pan in oven while it’s preheating. Keep an eye on it, and take it out of the oven as soon as butter is melted. It should do so before the oven reaches 350 F. Put the remaining 3 tablespoons of butter in a very large bowl on the stove where it’s warm to help it soften.

3. Sprinkle the bottom of the pan with the brown sugar evenly, again making sure to reach all sides and corner. Lift the pineapple slices from the juice (reserve the juice) and arrange them in a grid pattern. Sprinkle 3 tablespoons of the pineapple juice over. Sprinkle 1TBSP of maraschino liquid from the jar over the pineapple. You could push one cherry in the center of each ring now, if you want, but they’ll look better if you do this after the cake has been baked.

4. In a bowl, combine milk, the skimpy 1/2 cup canola oil and vanilla. In another bowl, sift together flour, baking powder and salt.

5. In the very large bowl where you set it to soften, beat together the remaining 3 tablespoons of butter (which should be very soft by now) and the sugar until light and pale lemon colored. It will look “mealy”. Beat in the eggs, one by one, then add the milk mixture, and the flour mixture (1 cup at a time) beating well after each addition. Pour batter over the pineapple rings, smoothing it out as necessary. It may looks like there is no enough batter: there is!

6. Bake in the preheated oven until cake is golden and a toothpick or skewer comes out clean. I am not sure how long exactly, I believe about 40 min-1 hour ( I did not keep good track of time). It Will be about this color:

Remove from oven, let cool until you feel comfortable handling the pan.

7. Now comes the tricky part: inverting the cake. Position the cake inside a rimmed cookie sheet (rim facing up). Put another rimmed cookie sheet on top of the cake (rim facing down). The cake is now sandwiched between two rimmed cookie sheet. Clamp the two cookie sheets together and invert the cake quickly and decisively but carefully. Remove the pan from the cake carefully. If necessary, use a spatula to remove any stuck ring and put it back on the cake. Scrape any caramel from the pan and put it on the cake.

8. Push one cherry in the center of each ring.

9. Let cool and cut into squares, one for each ring


Friday, January 9, 2009

Couscous Lentil Dinner


OK, so it isn't photogenic, but it was good and super quick and inexpensive. And tasty. And good for you... Wow, sounds pretty good to me

I am entering this couscous lentil dinner into Legume Love Affair.

Couscous Lentil Dinner

1 tbsp oil

½ cup onion, chopped

3 cups water

2 1/2 cups vegetable cocktail juice

2 cups brown lentils

2 bay leaves

2 cups couscous

¼ cup Parmesan cheese

2 tsp basil

1 (14 oz) can diced tomatoes

1. Saute oil and onion in large pot until onion is tender

2. Add water, juice, lentils and bay leaves. Bring to boil. Reduce heat to low and simmer about 25-30 minutes until lentils are soft but not mushy. Remove from heat and discard bay leaf

3. Add couscous, cheese, basil and tomatoes to pot and mix in. Cover and let stand about 5 minutes until couscous is soft. Fluff with fork and serve