Henry Rowengartner: Great! But I gotta ask my mom first.
The salad was great! So simple and easy! I will definitely repeat. AND, a bonus, I think the boy would like it as long as I add some ketchup to the dressing!
Tips and Changes for Next Time: Use a lot less vinegar. Use a lot of good tomatoes. I used grape which was fine, but mine were losing their freshness, so that didn’t help. Plus I should have added a lot more. I would sear hotdogs longer next time, until very dark since I like crispy dogs. I will also try to remember to drain them! Maybe add ketchup to the dressing.
 Rookie of the Year’s Chicago Dog Salad
 from the Rachel Ray 365 Cookbook
1/4 cup yellow mustard
2 tablespoons vinegar, eyeball it (I used 1 TBSP)
1 rounded teaspoon sugar
4 tablespoons vegetable oil (I used a little less)
1/2 medium red onion, thinly sliced (I used ¼ of a white onion chopped since I am not a huge raw onion fan)
1/2 of a 16-ounce sack shredded cabbage blend for slaw salads
1 romaine heart, shredded
2 vine ripe tomatoes, diced (I used a very large handful of grape tomatoes chopped up)
3 large half sour or garlic pickles, chopped (I used 2 or 3 scoops of relish)
Salt and pepper
8 pork or beef hot dogs, cut into 1-inch-thick slices on an angle (since it was just for my dinner and my lunch, I only used 4 and I used chicken dogs)
In the bottom of a large bowl, combine mustard, vinegar, sugar, and about 3 tablespoons of vegetable oil. Add the onions, cabbage, romaine, tomatoes, and pickles and toss the salad. Season with salt and pepper, adjust seasonings, and reserve.

Heat a large nonstick skillet over medium-high heat. Add in remaining 1 tablespoon vegetable oil (1 turn of the pan) then arrange the sliced dogs in a single layer. Sear them a couple of minutes on each. Remove to paper towels to drain (forgot this step! Showed, but wasn’t horrible).

Mound up the salad on plates, top with seared dogs, and serve

Then, I took this dinner a step further with a baseball movie themed side dish. Field of Dreams revolves around a farmer who hears voices coming from his cornfield. They tell him to build a baseball field in the field. He does build it, and “they” come. The field becomes populated by the ghosts of past baseball players. Got me thinking about corn…
Ray Kinsella: It's okay, honey. I... I was just talking to the cornfield.
So, for this one I tried my Joy of Cooking cookbook, but wasn’t happy with what I found. I then Turned to my Pillsbury cookbook and decided on Roast Corn on the Cob.
I will definitely repeat this one, but I will make a few changes. I wasn’t pleased with the paprika taste on the corn. I also wasn’t crazy about the Tabasco, but I could deal with that as it gave it a nice touch of heat (though it could be replaced by a little LITTLE bit of chili powder or cayenne maybe?). The corn was perfectly cooked though. Very juicy and tender, but not mushy. Just need to work on the flavoring.
Tips and Changes for next time: Remove paprika. Possibly replace Tabasco with a touch of another spice? Or maybe try garlic powder.
 Field of Dreams’ Roast Corn on the Cob
 adapted from “The Pillsbury Family Cook Book,” 6th printing, 1970
1 ear of corn
1 ½ tsp softened butter
Pinch salt
Pinch paprika
Pinch pepper
1 drop hot pepper sauce (used Tabasco)
Heavy foil
Pull corn husks away from cob but do not pull off completely.

Remove corn silk. Spread corn with mixture of butter, salt, paprika, pepper and hot pepper sauce. Fold husks over cob. Wrap corn in foil. Place directly on coals or in a 350 degree oven). Roast 30 minutes until corn is tender, turning occasionally.

Finally, for dessert, I turned to a combo chick flick and Baseball movie. A League of their Own is about the time during WWII when a professional women’s baseball league was created because most male players were at war. In the movie, and in real life, one of the league’s teams was the Rockford Peaches. This movie is based on real events, and at the Baseball Hall of Fame, there is an exhibit for the league and they sell Rockford Peaches jerseys.
Helen Haley: This is you! You're with us! You're a Rockford Peach!
This recipe was a little harder to come by. I wanted one that could be brought to work the next day since I have had too many sweets recently (this way I can pawn them off on coworkers who need a sugar fix). Peach cobblers dominated my books, but I wanted a cupcake or muffin. I turned to my new muffin book, but found nothing. So I improvised. I turned a banana nut muffin into a peach and seed muffin.
It was hard to get the right consistency within the muffin. I baked for 20 minutes and realized that the peaches had made the inside soggy, even though it was cooked and golden brown. I then baked for another 5 minutes, then (because I like my muffins firm) I turned them upside down in the tins to bake the bottom a few minutes. That did the trick. Still soft, but much better. In my opinion, the texture was better the next day, though. Taste was fantastic! Just need to fix the texture.

Tips and Changes for next time: Work on the baking time. I’d bake for 25 minutes, then flip them bottom side up, bake about 2 minutes then remove. I’d also put some sunflower seeds on top as they bake so that they stay on top and people can see what is in it. I keep fearing someone isn’t going to realize there are seed in them and then break out in hives, but so far so good!
 A League of Their Own’s Peach Sunflower Seed Muffins
, Adapted from Banana Pecan Muffins in “Muffins: 40 Tantalizing Recipes for Tasty Muffins”
Generous 1 cup flour
1 ½ tsp baking powder
Pinch of salt
1/3 cup light brown sugar
1/2 cup shelled sunflower seeds
2 ripe peaches diced
5 TBSP milk
2 TBSP butter, melted
1 large egg, beaten
1 tsp vanilla extract
Pinch cinnamon
1) Preheat oven to 375. Line 12 muffin cups.
2) Sift together the flour, baking powder and salt. Add sugar and seeds and stir.
3) Use a mixer to combine peaches, milk, butter, egg, cinnamon and vanilla.

Add to dry ingredients and gently stir until just combined
4) Divide batter between 8-12 muffin liner to get them about 2/3 full (number of muffins depends on the size of the peaches).
5) Bake for 20-25 min (then maybe turn them upside down in the tins to bake the bottoms more)
 The boy is coming back! I made a special treat in honor of his return, but more on that later. Since he was gone, along with all but 1 of my friends (with whom I had dinner twice), I just relaxed in the apartment all weekend. I cleaned my room, I watched Sex and the City (about 3 dvd’s worth) and I baked. First was chocolate chip cookies, then these grilled banana desserts, then the surprise goodie for the boy.
 Sliced Banana with Cinnamon Sugar and Chocolate Syrup
 Sprinkle banana with cinnamon sugar and put on hot grill. Grill until soft and warm. Top with chocolate syrup.
  Grilled Banana with Peanut Butter Chocolate Sauce
 In microwave, melt peanut butter, chocolate chips and chocolate syrup (about 20 sec). Combine and pour over banana and peanuts.

 Ok, so the recipe was a CHICAGO hotdog turned into a salad, so I decided to pair it with Rookie of the Year. The story of a kid whose arm becomes a fast-pitch machine after an injury. He is then recruited by the cubs.
 They come out thick, rich and fudgey with a wonderful depth of flavor from the coffee and caramel and a sweetness from the frosting. It combines so well that your daily trip to Starbucks may become superfluous!
 Self deprecating stupidity story aside, this is a great, (almost) fool-proof recipe that anyone who can even tolerate coffee will love.
 Caramel Macchiato Brownies
 (I have omitted the final steps that are based around the rocky road toppings)
 Mix ½ to ¾ cup of cream cheese frosting with a light sprinkle of instant coffee powder and spread on cooled brownies. Sprinkle with instant coffee powder to get a speckled effect.
 Put a handful of Worthers original chewy caramels in a microwave safe bowl with about a tablespoon of water and a pinch of instant coffee powder. Heat for 10 seconds at a time in the microwave (stirring once possible) until it is soft enough to drizzle on top.
  Drizzle the caramel over the brownie and decorate as you wish. Refrigerate.

 (
(
 Malted Milk Cupcakes with Chocolate Malt Frosting (adapted from
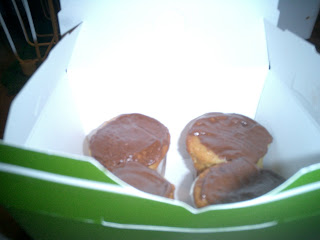 I also made up a little box with 4 of the mini-cupcakes for the boy to take with him. He's going to be gone for about a week (so expect some adventurous dinner ideas!)
 Those were not pretty, but they still tasted good, so after breaking off the dough avalanches, I still frosted them and brought them to work. Some made it without overflow, though!
  I may make these as full size next time, but make more frosting to cover them.
 Graham Cupcakes
 Chocolate Marshmallow Glaze
 As for the soup, I halved the recipe so that I didn’t waste 12 peppers if it wasn’t good. I am quite glad about this fact since I can’t get the green good into my mouth. Below is the full recipe as it appears on
  Add garlic and cook another minute. Add wine and cook down quickly, until about 1 tablespoon is left.
 Season to taste with salt and pepper. Cover and simmer until peppers are tender, about 30 minutes.
  3. In food processor or blender, purée mixture in batches until smooth. Adjust seasonings.
 4. Cover and chill overnight or for as long as 2 days or freeze (whisk well before serving if thawed). Can also be served warm.
 Is it the green goblin? No, it is my interpretation of what is supposedly a great recipe. I will write about it either this weekend or Monday, but major brownie points to anyone who can guess what it is. As I saw that this was not going to turn out to be an appetizing dish, I KNEW I was having a bum cooking/baking time. But, I had already promised the boy and his room mates muffins. So I was back into the kitchen for yet another try.
 I mixed the muffins, then poured them into 12 muffin tins greased with pam. I then baked. What did I see while they baked? This.
 Ya, no puffy muffiny-ness at all. Solid, non-rising dough mass. Not at all yummy. I felt like banging my head on a wall. The kitchen curse had continued. I took them out of the oven and got the muffin weights out of their pans.
  I used a silicone pastry brush to cover the top and part of the sides with butter, then dipped them in cinnamon sugar. This made the weights seem much more edible. Still, I couldn’t eat 3 bites of one without feeling sick.
 I took them over to the boy and as he lead me to his apartment I explained about the lack of leavener and the fact that they would be better for liftting to build upper body strength and that they may taste best if you cut off the bottom and just ate the top half (less weight and more butter and sugar). He took one and gave another one to each of his room mates. Their reactions “YUM! OH these are good! Just what I wanted!” WHAT!? WHAT!? Where did this come from? These things were kind of nasty, yet they loved them? Do I have that weird of taste? I just left the muffins there and told the guys to go at it, I’d pick up the plate the next day.
 Donut Muffins