Wednesday, September 15, 2010

Summer Vegetable Pasta

Nothing screams summer like an abundance of zucchini, squash and basil. Put them to good use in this quick and easy pasta dish.
2 Tips for this recipe:
1. SEASON IT- this one needs salt and pepper. Do NOT skimp on the seasonings. Also, use real basil in this one, not those tubes of the chopped stuff. That works for some recipes, but not this one.
2. I make leftovers to bring to lunch. If you do so as well, do not reheat this dish. Eat it chilled and do not microwave. It ruins the consistency/texture.

Summer Vegetable Pasta
  • 1 pound corkscrew pasta, such as rotini
  • 1/6 cup extra-virgin olive oil
  • 4 cloves garlic, finely chopped
  • 1/2 cup Italian-style breadcrumbs
  • 2 zucchini, thinly sliced in 1/2 moons
  • 1 yellow squash, thinly sliced in 1/2 moons
  • 4 ears corn, kernels scraped off
  • 6 ounces Swiss cheese, shredded
  • Salt and pepper
  • 1/4 cup finely chopped fresh basil


Directions:

  1. In a large pot of boiling, salted water, cook the pasta until al dente. Drain, reserving 1 cup of the pasta cooking water and the pot.

  2. Meanwhile, in a small skillet, heat 2 tablespoons olive oil over medium heat. Add half of the garlic and cook until golden, about 30 seconds. Stir in the breadcrumbs and remove from the heat.

  3. In the reserved pasta pot, heat the remaining 2 tablespoons olive oil over medium heat. Add the remaining garlic and cook until golden, about 30 seconds; add the zucchini and squash and cook, turning occasionally, until crisp-tender, about 5 minutes. Stir in the corn, cooked pasta and as much of the reserved cup pasta cooking water as you like (I usually use about 1/2 cup). Add 1 cup cheese and toss; season with salt and pepper.

  4. Stir the remaining cheese and the basil into the breadcrumb mixture and sprinkle on top of the pasta.

Beans and Pasta

I have meant to post this recipe for ages. I have made it...I don't even know how many times! It's really tasty, easy and filling, as well as pretty healthy. Nowadays the Boy and I are trying to reduce our meat intake, so this bean filled, vegetarian dish is perfect.

2 cups Bowtie pasta

1 Tbsp olive oil

2 medium carrots, diced

1 large onion, chopped

2 cloves garlic, chopped

1 tsp basil

1 tsp rosemary

1 tsp oregano

1 (28 oz) can diced tomatoes, undrained

1 (19 oz) can kidney beans, drained and rinsed

1 (19 oz) can chickpeas, drained and rinsed

Parmesan cheese to serve

Directions

1. Cook until tender but firm. Drain.

2. Heat oil over medium heat in a large deep skillet.

3. Add carrots, onion and garlic to skillet. Cook until tender.

4. Add spices and tomatoes to skillet. Bring to a boil.

5. Add beans to skillet.

6. Add cooked pasta to skillet. Simmer gently for 2 minutes. Serve in soup bowls. Sprinkle with Parmesan cheese.


Monday, May 17, 2010

Brownie Bottom Cheesecake


I have not posted a dessert in a while, have I? Tsk tsk to me!

I made this absolute delight for a game night with some law school friends back during a magical time before finals. Ahhh I vaguely remember those days...Anyway, finals are done, vacation is done and now on to work for the summer. Because it seems like my summer meals have been scheduled for me by the firm, the only non-sweets you will see on here this summer will likely be ones I have already photographed and just need to post. I do intend to bake for coworkers (once I can remember how to get around the super confusing hallways to offer them said baked goods) so you may see more desserts up here in the coming weeks.

This cheesecake was super rich, but was wonderful. I would say there were about 16 of us at the game night, and we polished it off completely, but none of us could eat any more because it really was rich and a sliver was enough. The combination of brownie and cheesecake/cream cheese is a classic (see, e.g. these beauties and this brownie with a cream cheese frosting). This cake takes that combo to a whole new level- and looks super impressive to boot. The chocolate on top can cover any cracks and the end result looks like you bought it at cheesecake factory. Gotta love that wow factor when you have to correct people "No, actually I made it." "NO WAY!!"
Brownie Bottom Cheesecake (adapted from AllRecipes)

Ingredients
  • 1 box of brownie mix for 8x8"pan (I used Ghiradelli Triple Chocolate Mix)
  • Ingredients for brownie mix
  • 1/2 cup mini chocolate chips- if brownie mix does not include chips
  • 3 (8 ounce) packages cream cheese, softened
  • 1 (14 ounce) can Sweetened Condensed Milk
  • 3 large eggs
  • 2 teaspoons vanilla extract
Directions
  1. Preheat oven to 350 degrees F. Grease bottom only of 10-inch springform pan. Prepare brownie mix as package directs for chewy brownies. If chocolate chips are not included in brownie mix, mix in the chocolate chips. Spread evenly in prepared pan. Bake 35 minutes or until set.
  2. In large mixing bowl, beat cream cheese until fluffy. Gradually beat in sweetened condensed milk. Add eggs and vanilla; mix well. Pour into prepared pan.
  3. Reduce oven temperature to 300 degrees F. Bake about 60 minutes or until set and beginning to become golden at edges. Cool. Chill thoroughly (very important! do not try to remove from pan while at all warm). Remove side of springform pan. Melt chocolate and drizzle over top (do after cake is removed from pan or else the chocolate will stick to the edges and rip your top if you are not careful). Store leftovers covered in refrigerator.

Saturday, May 15, 2010

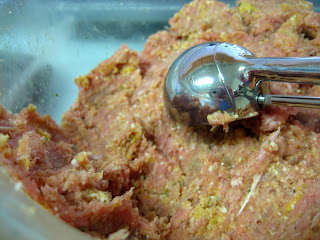
Pioneer Woman's Spaghetti and (Turkey) Meatballs


Since I made this dinner for 2 of my good friends, I will let them give you an intro into Pioneer Woman's Spaghetti and (Turkey Version) Meatballs:

J: The meatballs were really really really moist and delicious

K: I liked it very much.

Neither minded that I made the meatballs with all turkey, and in fact, one said she preferred it to the typical, all-beef meatball

The Sauce for the meal came out WONDERFULLY. I had twice before tried to make homemade pasta sauce with either tart or bland results. This came out great (though I did tweak a little to get there).

Also of note- these freeze very well. Which is good since it makes way way WAY more than the 3 of us could eat.

Pioneer Woman's Spaghetti and Meatballs- Turkey Version
Ingredients
Meatballs:
  • 1.5 lbs ground turkey
  • 3 cloves Garlic, Minced
  • ¾ cups Bread Crumbs
  • 2 whole Eggs
  • ¾ cups Grated Parmesan
  • ¼ cups Flat-leaf Parsley, Minced- I used a little less and used some dried
  • dried basil to taste
  • ¼ teaspoons Salt
  • Freshly Ground Black Pepper
  • Splash Of Milk
  • ½ cups Olive Oil
Sauce:
  • 1 whole Yellow Onion, Diced
  • 3 cloves Garlic, Minced
  • 1 whole (28-ounce) Can Whole Tomatoes
  • 1 whole 28 Ounce Can Crushed Tomatoes
  • pinch of red pepper flakes
  • ½ cups Red Wine
  • ¼ teaspoons Salt
  • 1 teaspoon Sugar
  • Freshly Ground Black Pepper
  • dried basil, parsley and oregano to taste
  • ¼ cups Flat-leaf Parsley, Minced
  • 8 whole Fresh Basil Leaves, Chiffonade
  • 2 pounds Spaghetti, Cooked To Al Dente
Preparation Instructions

To make the meatballs, combine meat, garlic, breadcrumbs, Parmesan, eggs, salt, pepper, parsley, basil, and a splash of milk in a mixing bowl. Mix together well with hands. Roll into 25 1 1/2-inch balls and place on a cookie sheet. Place cookie sheet into the freezer for 5 to 10 minutes (or fridge for about 30 min) to firm up.

To brown the meatballs, heat olive oil in a heavy pot or large skillet over medium-high heat. Add meatballs 5 at a time, turning to brown. Remove and drain on a paper towel after each batch. Set meatballs aside.

In the same pot, add the onions and garlic and cook for a few minutes, or until translucent. Pour in whole tomatoes, crushed tomatoes, red pepper, and wine. Add salt, pepper, sugar, dried herbs and parsley. Stir to combine and cook over medium heat for 20-30 minutes.

Add meatballs to pot and stir in gently. Reduce heat to a simmer and cook for 30-40 minutes, stirring very gently a couple of times during the simmer.

Just before serving, stir in basil if using.

Serve over cooked spaghetti. Sprinkle with extra Parmesan.

Sunday, April 18, 2010

Turkey Tetrazzini

Back in late October I hosted a pre-Thanksgiving supper club dinner. Because I hosted, I made the entree, a turkey breast. A whole, bone in turkey breast. For 4 girls. To say I had leftovers is an understatement. I found this recipe on AllRecipes and tweaked it to my liking. LOVED IT.
After Christmas, my mom was asking if I had any recipes for leftover turkey, and I told her about having made this with the leftover supper club turkey. She loved the idea, so we made it, and she, too loved it.
Now I bring the recipe to you in case you ever find yourself with so much leftover turkey and no clue what to do with it. It makes a sort of turkey casserole. The sauce for it is great though, so much better than some canned "cream of" soup as a base. I would even recommend trying the sauce for tuna noodle casserole as a way to avoid the canned soup base. Much yummier (and probably a LOT less sodium too).

Each time I have made this I halved in and baked in a 9" round cake pan or an 8x8 cake pan. If you make the whole recipe, use a 9x13 pan I think. The entire recipe should make about 6-8 servings.

Turkey Tetrazzini

Ingredients
  • 1 package uncooked rotini
  • 1/2 cup butter
  • 1 tsp minced garlic
  • dried parsley, basil and oregano to taste
  • pepper to taste
  • 1/2 cup all-purpose flour
  • 3 cups chicken broth
  • 2 cups milk
  • 1 2/3 cups grated Parmesan cheese
  • 4 cups chopped cooked turkey
  • 1/2 cup bread crumbs
Directions
  1. Preheat oven to 350 degrees F . Lightly grease a medium baking dish.
  2. Bring a large pot of lightly salted water to a boil. Add rotini, and cook until al dente. Drain, and place in the prepared baking dish. Add turkey.
  3. Melt butter with garlic, pepper and parsley/oregano/basil in a medium saucepan over medium heat. Stir in flour and cook, stirring constantly for a minute or so until a thick roux forms. Mix in chicken broth and milk. Cook and stir until the mixture comes to a boil. Stir in about 1 1/3 cups Parmesan cheese, and remove from heat.
  4. Mix chicken broth mixture (to taste: I used about 1/2 of it, but other people prefer theirs saucier and should use more) with rotini and turkey. Top with remaining cheese and breadcrumbs. Bake 1 hour in the preheated oven, until surface is lightly browned.

Swiss Apple Grilled Cheeses

As I previously mentioned, I hosted a friend's birthday a while back and made various snacks, including these Swiss Apple Grilled Cheese triangles. My friend said it tasted like her favorite fondue (swiss with apples, who would have thought?!) Basically, very good.
I have made these like regular grilled cheese in a pan (with olive oil instead of butter) and in a panini press without any oil, and I think I liked the panini press better, but you can certainly make them as you would make a regular grilled cheese.
Grilled Apple Swiss Cheese

Ingredients
2 slices whole wheat bread
1/4 Granny Smith apple - cored and sliced
1/3 cup shredded Swiss cheese

Directions
Preheat the panini press to medium heat. Place 1 slice of bread onto the press, and arrange the apple slices evenly over the top. Sprinkle the Swiss cheese over the apple, then top with the remaining slice of bread. Cook until the bread is golden brown and the cheese is melted, 1 to 2 minutes. Cut into diagonal qurters for finger food.
Posted by Picasa

Saturday, April 17, 2010

Pizza Dip


A few weeks ago I hosted a friend's surprise birthday party. Now I am studying for finals. Guess which was more fun? TOTALLY finals, right?
While, sadly, the fun awesome time of the party is past, I would like to share what I made. I made the Italian grilled cheeses, swiss apple grilled cheeses, pigs in a blanket (ALWAYS disappears!! I made 150% of what I thought we'd need and there was still not a single one left), bean dip, chocolate chip cookies, the black forest cake and this pizza dip.
Hot Pizza Dip

Ingredients
  • 2 (8 ounce) packages cream cheese, softened
  • 1 teaspoon dried oregano
  • 1 teaspoon dried parsley
  • 1 teaspoon dried basil
  • 1 teaspoon garlic, minced
  • 1.5 cups shredded mozzarella cheese
  • 1 cup grated Parmesan cheese
  • 2 cups pizza sauce
  • 1/2 bell pepper, chopped
  • 2 ounces sliced pepperoni, cut into 1/4s
Directions
  1. A day or 2 before you want to serve, do steps 1-3. Do step 4 right before serving. Spread pepperoni on a few layers of paper towels on a microwave safe plate. Cover with another paper towel and microwave 30 sec-1min to get the grease out. Pat dry and let cool.
  2. In a small bowl, mix together the cream cheese, oregano, parsley, garlic and basil.
  3. Spread mixture in the bottom of an 8x8 microwave-safe dish. Sprinkle 1 cup of the mozzarella cheese and 1/2 cup of the Parmesan cheese on top of the cream cheese mixture. Spread the pizza sauce over all. Sprinkle with remaining cheese, then top with bell pepper and pepperoni. Cover and refrigerate for a day or 2 until ready to serve (the flavors mesh well during this time).
  4. Cover, and microwave for 6 minutes. Serve hot with crackers (bread may also be good).

Thursday, March 4, 2010

Cashew Chicken

Normally I take forever to post something, but I JUST finished eating this and had to post. 2 reasons: 1. it was absolutely delicious and 2. I had to make a number of changes to the recipe, so I wanted to get it down while I remember. But mostly #1, bucause it really was good.
Because of the number of changes I made, I won't even go through it here. Just trust me on the changes. Also note: most of my recipes make 4 servings, this makes 2. Keep that in mind.
Cashew Chicken (adapted from Williams-Sonoma: The Weeknight Cook)
Serves TWO (2)

Ingredients
3TBSP soy sauce
1 1/2 TBSP white wine
1 tsp ginger
2 chicken cutlets cut into bite sized pieces
1/2 tsp Worcestershire sauce
3/4 tsp sesame oil
1/2 tsp sugar
1/4 tsp cornstarch
1/2 head of broccoli cut into small florets
1 TBSP canola oil
2 green onions, chopped
3/4 cup salted cashews
steamed rice, to serve

Method
1. Marinate Chicken: in bowl, combine 2 TBSP soy sauce, 1 TBSP wine, and ginger. Stir in chicken and allow to marinate for 15-30 min.
2. Make the sauce: in a small bowl, combine 1TBSP water, remaining 1TBSP soy sauce, remaining 1/2 TBSP wine, Worcestershire sauce, sesame oil, sugar and cornstarch and stir to dissolve sugar and cornstarch,
3. Stir Fry the chicken. Steam the broccoli very briefly (about a minute) in the microwave so that it is not undercooked at the end. Heat oil in frying pan over medium high heat. Remove chicken from marinade and drain well, discarding marinade. Add chicken to pan and stirfry until slightly brown. Add cashews and stirfry another 30 seconds or so. Using a slotted spoon, move the chicken and nuts BUT NOT THE OIL to a bowl. Heat pan to medium high and stirfry green onions about 30 seconds until fragrant, add chicken and nuts and broccoli. Stir the sauce and add to pan. Stir until sauce thickens slightly (this happened very fast for me). Serve over the rice.

Wednesday, February 24, 2010

Quick Black Forest Cake

I appologize for the photos. I brought this cake to school and it was devoured, so the only pics I got were from a friend's IPhone. Trust me, it was good, and looked a lot better than these pictures show. It was a friend's birthday, but I had about 100 pages of reading for the night, so this quick, easy and delicious cake did not dispoint on any front. Also, it was the best cake batter I have ever tasted. I likely could have eaten the whol cake's worth of cake batter...not that I thought about that or anything...
Quick Black Forest Cake
1 (18.25 ounce) package chocolate cake mix
3 eggs
scant 1/2 cup water
scant 1/2 cup oil
1 tablespoon almond extract
1 (21 ounce) can cherry pie filling
1 cup chocolate chips (I used Hershey's Special Dark chips to make it even more chocolatey)
chocolate frosting (I used a storebought one, but homemade is always better if you have time)
marachino cherries
almond extract

Directions
Preheat oven to 350 degrees F (175 degrees C).
Mix together: cake mix, beaten eggs, oil, water, almond extract, cherry pie filling and chocolate chips. Stir until just combined. Pour batter into a greased 9x13 inch pan.
Bake in a 350 degree F (175 degree C) oven for 45 to 50 minutes or until a toothpick inserted in the center comes out clean. Remove cake from oven and let cool. While cooling, you can drizzle some of the marachino cherry juice over the cake to soak in.
Combine frosting, about a teaspoon of the cherry juice and about 1/2 teaspoon of the almond extract to taste, being careful not to make the frosting watery. Frost the fully cooled cake. Drain the cherries and decorate the top of the cake with them. Eat within a day as the marachino cherries start to release their juice after a while.
Posted by Picasa

Monday, February 15, 2010

Baked Crab Rangoons


Happy Valentine's day to all. Or in my case, a Happy "Girls Night In" Day. The boy will be back in a bit, but for tonight I was without him, so I used the opportunity to make a thank you dinner for one of my single gal pals. Did I just say "gal pals"? Forgive me, must be the strawberry margaritas speaking.
Anyway, I made a 3 course thank you dinner. It started with these baked crab rangoons. Followed by a Chinese chicken salad with a home made sesame soy dressing and ending with a brookie (brownie cookie, aka cookie in a brownie). While all parts were good, I think the crab rangoons were best. I made 13 rangoons and the 2 of us ate every last one.
These guys are SO easy too. Mix, place in won tons in muffin cups, bake. Done.

I was really afraid that these would be really gross once I opened the can of crab meat. I have never used canned crabmeat before, so I was shocked to open it and find that it smelled a little like canned tuna. Not what you want in your crab rangoon. After I drained it and mixed it with the other ingredients though, it tasted nothing like that smell, and was really good. Just make sure to drain it.

Also, I think this is a great base recipe for a crab dip. Add old bay, maybe replace the green onion with regular onion, add some cheese and bake in a casserole dish and it should be great. Just a thought from a girl who loves crab dip a little too much (what can I say, I am always a Marylander at heart).Baked Crab Rangoons

Ingredients

  • 1 (170 gram) can crabmeat- drained well
  • 125 grams (a little more than 1/2 package) Brick of Cream Cheese, softened
  • 1/4 cup thinly sliced green onions
  • 1/4 cup Mayo (I used the olive oil based mayo as it is all I buy nowadays)
  • 12 wonton wrappers
  • Optional: Sesame seeds and/or green onions for garnish

Directions

  1. Heat oven to 350 degrees F. Mix crabmeat, cream cheese, onions and mayo.
  2. Spray 12 muffin cups with cooking spray (not too heavily). Gently place 1 won ton wrapper in each cup, allowing edges of wrappers to extend above sides of cups. (I realized it is best not to try to bend the middle parts onto themselves to make it flat, let the insides be bumpy, it firms up better) Fill evenly with crabmeat mixture.
  3. Bake 18 to 20 min. or until edges are golden brown and filling is heated through. (I then placed them on paper towels for a few minutes to absorb the extra oil and firm up) Serve warm. Garnish with chopped green onions and sesame seeds, if desired.

Sunday, January 24, 2010

We'll call them Franken-Muffins

I found this GREAT post a while ago on tastespotting. It was a basic muffin formula that you adapt for whatever type of muffin you wanted to make, and it gave some suggestions for combinations. But really, give me time to peruse the grocery store and I can come up with my own combination rather easily. And that's just what I did. Introducing, the delicious and rather healthy Franken-muffin. OK, so the name may not work, but my combination of ingredients did!
Here is MY Version:
Dry ingredients
2 cups all-purpose flour
2 tsp baking powder
1 tsp baking soda
1 tsp spice cinnamon
1 tsp ground ginger
1/2 cup dried cranberries
1/2 cup chopped pecans

Wet ingredients
1 cup plain yogurt
1/4 cup vegetable oil
scant 1 cup white sugar
1 egg, beaten
pinch of salt
1 tsp vanilla extract
3/4 cups grated zucchini
3/4 cups grated apple

PROCEDURE
Preheat oven to 375˚F.
Grease a muffin tin (12 count- I needed about 14 muffin cups if they had all been full size, or 12 regular muffins and 12 minis) with grease spray or butter.
Get two big bowls. In the first bowl combine the dry ingredients except the dry muffinhancers.
In the other bowl combine yogurt, sugar, salt, melted butter, egg and extract. Mix it all up until it’s good and smooth. Now mix in both the wet and dry Muffinhancers and stir to distribute.
Make sure your oven is set and the muffin tin is greased up before you combine the wet and dry. It’ll need to happen pretty quickly.
Pour the dry mix into the wet bowl and fold gently with a spatula while you count slowly to 15-20. The result should be a very lumpy batter, with frequent dry floury spots. It’s better if it’s not a smooth batter.
Now use an ice-cream scoop or just a big spoon to fill the muffin tray evenly. Fill it up almost to the top of the tray. Bake for 20-25 minutes (about 13 minutes for the minis). When they are done, turn it over onto a clean tea towel to let them cool.

And here is the basic formula:
Dry ingredients
2 cups all-purpose flour
2 tsp baking powder
1 tsp baking soda
2 tsp spice (cinnamon, cloves, cardamom, ground ginger, ground coriander, etc)
1 cup of dry Muffinhancers (can be chopped nuts, dried fruits, toasted coconut, chocolate chips, etc)

Wet ingredients
1 cup plain yogurt
1/4 cup melted butter (or vegetable oil)
1 cup white sugar
1 egg, beaten
pinch of salt
1 tsp vanilla extract
1 ½ cups of wet Muffinhancers (can inc: mashed banana, grated zucchini, grated carrots, grated apple, frozen berries, mango puree, chopped up orange, etc)

PROCEDURE
Preheat oven to 375˚F.
Grease a muffin tin (12 count- I needed about 14 muffin cups if they had all been full size, or 12 regular muffins and 12 minis) with grease spray or butter.
Get two big bowls. In the first bowl combine the dry ingredients except the dry muffinhancers.
In the other bowl combine yogurt, sugar, salt, melted butter, egg and extract. Mix it all up until it’s good and smooth. Now mix in both the wet and dry Muffinhancers and stir to distribute.
Make sure your oven is set and the muffin tin is greased up before you combine the wet and dry. It’ll need to happen pretty quickly.
Pour the dry mix into the wet bowl and fold gently with a spatula while you count slowly to 15-20. The result should be a very lumpy batter, with frequent dry floury spots. It’s better if it’s not a smooth batter.
Now use an ice-cream scoop or just a big spoon to fill the muffin tray evenly. Fill it up almost to the top of the tray.
Bake for 20-25 minutes (about 13 minutes for the minis).
When they are done, turn it over onto a clean tea towel to let them cool.
Posted by Picasa