Monday, December 29, 2008

Mandarin Chicken

I am once again restocking my freezer with meals so that I can eat quickly but well during the semester. I look forward to bringing out this really easy dish during one of those hectic days.
Looking at these pictures, I am starting to wonder if I forgot to add the flour. I don't think so, I am pretty sure I added it, but sometimes my mind plays tricks on me. The sauce as I had it was a little runny, so I used a slotted spoon to serve the chicken. Perhaps this is a sign that I forgot the flour? If so, I am ok with that because it was tasty as is...just don't pour all the liquid over your rice.
Mandarin Chicken

5 cups cooked chicken, cubed
4 tsp flour (did I use it?)
1 1/3 cups chicken broth
1 can frozen orange juice concentrate
1 cup sliced green onions
2 chicken bouillon cubes

On serving day:
2 (11 ounce) cans mandarin oranges, drained
Hot cooked rice

Combine flour (?), broth, frozen orange juice concentrate, green onions and chicken bouillon cubes over medium-high heat. Bring to a boil, reduce heat and add chicken, simmering uncovered for 3-4 minutes. Cool and pour into freezer containers.

On cooking day, thaw orange chicken mixture. Heat chicken in a saucepan until heated through and bubbly, then add mandarin oranges, continuing to heat mixture. Serve over rice.

Tuesday, December 23, 2008

Garlic Bread Twists with Cheese

You know those times when you try a recipe and you know you will be making it forever? This is one of those times. I have already made this recipe 4 times, and 2 of those times I made a double batch.
I don't know how, but these rolls come out so soft and almost buttery, yet there is no butter in them! They certainly remind me of restaurant quality rolls, and my friends who have had them seem to agree.
Garlic Bread Twists with Cheese

3 cups all-purpose flour, divided use
2 ½ tsp active dry yeast
1 TBSP granulated sugar
1 ½ tsp salt
1 ¼ cups warm water (110F)
1 TBSP canola oil
1 cup shredded mozzarella or cheddar cheese
1 clove garlic, minced
olive oil for brushing

1. Spray a baking sheet with cooking spray; set aside.
2. Combine half of the flour with yeast, sugar and salt in a large bowl; add warm water (110F) and oil; mix until smooth.
3. Stir in garlic and as much of the remaining flour as needed to make a stiff dough (usually I need all of it).
4. Turn dough out onto a floured surface and knead 4 or 5 times or until smooth and elastic.
5. Divide dough into fourths; shape each portion into a ball then divide each ball into 10 portions. Shape each portion into an 6-inch stick. Brush 1 stick with water and twist it with another stick, pressing at the top and the bottom. Arrange the twists on a baking sheet. Repeat with the remaining sticks.
6. Place twists 2-inches apart on baking sheet. Brush the twists with olive oil and sprinkle cheese on top. Cover and let rise in a warm place for about 50 minutes.
7. Preheat oven to 400°F. Bake until lightly browned (just a very light brown in places), 12 to 15 minutes.


Tip: after baking, can wrap and store in freezer bag. Reheat in microwave.

Monday, December 22, 2008

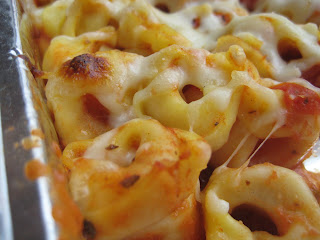
Baked Tortellini


When I was in high school, I was a dork. My friends are probably reading this going "Was??" Ignore them, I prefer the past tense. But I was a dork. I was involved in Odyssey of the Mind, Destination Imagination (what OM became in my area after corporate struggles), Mock Trial, and, of course, FFA. Now you may say to yourself that I surely did not have time and these are certainly not related, and yet they are all related, and they all lead to this fabulous meal.
Were it not for Mock Trial, I may never have decided to go to law school. If I didn't go to law school, I would not have searched for a quick and delicious meal to keep me full through on of my class days that went until 7:15pm. Were it not for FFA I would not have come to love cheese so much and I may not have thought to top tortillini with cheese and bake it. Were it not for OM and DI teaching me "creative problem solving" and "effective use of materials" I may not have been so resourceful, and may have instead just opened a can of soup. But what can of soup can compete with warm cheese tortellini tossed with tomato sauce, topped with mozzerella and baked until browned. No soup can come close. Sorry, Campbells.
Baked Tortellini
1/3 package of dried cheese tortellini
pasta sauce to taste
about a tablespoon of milk (optional)
about a tablespoon of pesto (optional)
mozzerella cheese to taste

Preheat oven to 375. Cook trotellini according to package directions. Drain. Mix with sauce, milk, and pesto (if using). Pour into grilling pan (can double recipe and cook in 8x8pan). Top with cheese. Bake until cheese melts and begins to brown.

Sunday, December 21, 2008

Parmesan Crusted Chicken

So, I am back from the no-man's land that is law school finals. WOOO! I have a life again. WOO! I still don't have time to blog. Boo... Oh well, at least I am kind of back.
This chicken dish definately helped me get through finals. I made a big batch and froze it back when I had time, so during finals, I would just defrost it overnight and have dinner with 1 minute of active work while studying. Easy enough! And so good! I love the parmesan and oats together! Delicious! This is even good with or without the sauce.
I recomend this delicious meal as a keep on hand item, replacing those store-bought chicken strips with these cutlets will make you feel so much better during those rushed days, which, let's be honest, we ALL have far more frequently than we would like to admit ;)

Parmesan Crusted Chicken (Adapted from Robin Miller's Quick Fix Meals)
Vegetable oil spray
2 tablespoons all-purpose flour
3/4 teaspoon salt, divided
3/4 teaspoon freshly ground pepper, divided
4 chicken cutlets
2 large eggs, lightly beaten
1 tablespoon water
1/3 cup grated Parmesan cheese
1/4 cup quick-cooking oats
2 teaspoons salt-free garlic and herb seasoning
Sweet-N-Hot Mustard Dip (recipe follows)

Heat oven to 400 degrees F. Line a baking sheet with foil and spray it with vegetable oil.

In a shallow dish or plastic bag, combine the flour and 1/2 teaspoon each salt and pepper. Add the chicken and turn or shake to coat completely.

Whisk the egg and water in a separate shallow dish. In a third shallow dish, combine the Parmesan, oats, garlic seasoning and remaining salt and pepper.

Dip the flour-coated chicken into the egg, then transfer to the Parmesan mixture, turning and pressing to coat completely.

IF STOPPING TO FREEZE: wrap in plastic wrap and freeze. Thaw completely in fridge before baking.

IF COOKING: Place on the prepared pan and spray with vegetable oil. Bake until crust is golden brown and chicken is cooked through, about 20-25 minutes, turning half way through.

Serve with dipping sauce.

SWEET-N-HOT MUSTARD DIP

1/4 cup Dijon mustard
2 tablespoons honey
2 packs of Chinese mustard (like you get with Chinese take out)
1/4 teaspoon garlic powder

Stir together all ingredients for the dip.

Makes 4 servings

Wednesday, December 10, 2008

Sorry

Sorry for my absence. This 1L is in finals mode and will emerge from under her covers on Friday.
FYI-BarBri's online lectures ROCK and have saved my bum. I am willing to be a walking spokesperson after realizing that the guy who wrote my civpro textbook did the civpro lecture!

Wednesday, November 26, 2008

Three Bean Cassoulet

I don't know whether I would call this a stew or a solid entree, but whatever it was, it was good! I really did not think I would like it, I made it just because it would be cheap, but it was sooooo good! I ate it with a crusty roll and a spoon as my utensils and loved every moment if it.
Need MORE reasons to make this dish?
-its good for you! Very high in fiber and protein and counts as 2 or 3 veggie servings if you eat an entree size portion
-super easy. Chop. Mix. Bake, mixing occasionally.
-freezes well. I froze the leftovers in individual portions and microwave them for a great quick lunch
-Did I mention it is cheap and delicious? It cost about $5 to make 5-6 dinners that I loved!
-It makes an entry for Legume Love Affair
Three Bean Cassoulet
  • 2 cans (14-1/2 ounces each) stewed tomatoes
  • 1 can (15 ounces) garbanzo beans or chickpeas, rinsed and drained
  • 1 can (15-1/2 ounces) great northern beans, rinsed and drained
  • 1 can (15 ounces) butter beans, rinsed and drained
  • 1 cup finely chopped carrots
  • 1 cup finely chopped onion
  • 2 garlic cloves, minced
  • 1 bay leaf
  • 2 teaspoons dried parsley flakes
  • 1 teaspoon dried basil
  • 1/2 teaspoon salt
  • 1/2 teaspoon dried thyme- I didn't have, so I used oregano
  • 1/8 teaspoon pepper

Directions:

In an ungreased 3-qt. baking dish (I used a 9x13 pan), combine all ingredients. Cover and bake at 350° for 60-70 minutes or until vegetables are tender, stirring occasionally. Discard bay leaf.

Saturday, November 22, 2008

One more thing...

So I mentioned how I spent this weekend so far sick and writing a memo, but I neglected to mention that I got roped into watching part of a soccer game on TV. As the boy and I were watching, he tried to explain how this one coach starts off very poorly with each team he coaches, but he does get better.

Insert law school commentary that ran through my head in rapid-fire:
-I don't know about in England, but here in the US his request to get a guaranteed multi-year contract, so that he can improve, would have to be signed and in writing or else it would violate the statute of frauds (See e.g. Elizabeth Arden)
- well wait, the restatement and the UCC both require a signed writing for contracts over a year (correct me if I am wrong, I have not reviewed my contracts outline yet), and Dell did not sign the warranty for my lovely yellow laptop. This is probably OK because I bet it is on Dell letterhead which counts as a signature.
-Would my Dell purchase fall under the UCC (products) or common law restatements (if it is a service) (See e.g. Princess Cruises). Do I have a seperate contract for the warranty as from the purchase of the computer, or is it all one?

I told the basic gist of this to the boy. His response "Ya...but the coach isn't in the US."
Sometimes you need a clear, non-law school head to make the connections seem so silly.

This happened to me the other day when riding the metro, but I will save that fun diatribe for another day. Hint: It's a tort theory based on being a common carrier!

M&M Cookies


My weekend thus far has included being sick, writing a memo and being slightly less sick. Oh for it to be winter break. I'm especially looking forward to winter break because 2 days after my last final, my friends are hosting a Christmakkah party! I love the holidays! Good food, fun, and finally spending quality times with friends!
Perhaps I will bring these cookies to the holiday party. Joelen is hosting a cookie swap, and I think these would be perfect. They are M&M cookies from sophistimom. They are so simple and yet good. I made these at the boy's apartment, meaning without the help of an electric mixer of any sort. I put the boy and his friend to work beating the butter and sugar with just a wooden spoon. It took a while, but that is what manual labor is for. The making of the cookies with no kitchen gadgets is really a testimony to their true ease.
M&M Cookies

2 1/2 cups all-purpose flour
1/2 teaspoon baking powder
3/4 teaspoon salt
2 sticks room temperature butter
1 3/4 cups sugar
2 eggs
1 tablespoon pure vanilla
1 regular package (2 ounces or 55g) M&M candies

1. Preheat the oven to 375 degrees.
2. Whisk the flour, salt, and baking powder in a medium bowl. Set aside.
3. With an electric mixer, cream the butter on high until smooth and light, about 2 minutes. Next add the sugar and continue beating until light in color and fluffy. With the speed on low, add eggs one at a time, followed by the vanilla. Beat until smooth.
4. Turn off the mixer and scrape down sides of bowl. Turn the mixer to low and slowly add the dry ingredients. Mix until just incorporated.
6. Scoop out dough by 2 tablespoonfuls and place about 2 inches apart on a baking sheet. Press 5-8 M&M’s on each ball of dough. Flatten each ball of dough slightly with the bottom of a glass. Bake for 12-15 minutes, or until barely golden brown on the edges.
7. Remove from oven and let rest on the baking sheet for about 5 minutes before transferring to a cooling rack.

Monday, November 17, 2008

Peanut Butter and Oatmeal Chocolate Chipsters

Kind of in a hurry to finish up my torts outline, so this will be quick. I got this recipe from the Tuesdays with Dorie group and it is delicious. Was a huge hit. I describe them as kitchen sink cookies because they are the 3 best cookies mashed together (PB, oatmeal and chocolate chip, yum!). I was even able to freeze these and just bring to room temp or microwave to have a dessert in an instant.
Tips: Don't overcook. About 12 minutes is perfect. I baked them in cold balls without flattening so that they didn't become any thinner then they needed to. Any more and they tended to get hard and too crispy for my tastes. Also, I liked adding a few peanuts to the top to add to the peanut butter look and taste.
3 cups old fashioned oats
1 cup all purpose flour
1 tsp baking soda
2 tsp ground cinnamon
1/4 tsp freshly ground nutmeg
1/4 tsp salt
2 sticks (8 ounces) unsalted butter, at room temperature
1 cup peanut butter--I used chunky and would do so in the future as well.
1 cup sugar
1 cup (packed) light brown sugar
2 large eggs
1 tsp pure vanilla extract
9 ounces bittersweet chocolate, chopped into chunks, or 1 1/2 cups store-bought chocolate chips or chunks

Whisk together the oats, flour, baking soda, spices and salt.

Beat the butter, peanut butter, sugar and brown sugar on medium speed until smooth and creamy. Add the eggs one at a time, beating for 1 minute after each addition, then beat in the vanilla. Reduce the mixer speed to low and slowly add the dry ingredients, beating only until blended. Mix in the chips. If you have the time, cover and chill the dough for about 2 hours or for up to one day.

Preheat oven to 350 and line cookie sheets w/ parchment.

If the dough is not chilled, drop rounded tablespoonfuls 2 inches apart onto the baking sheets. If the dough is chilled, scoop up rounded tablespoons, roll the balls between your palms and place them 2 inches apart on the sheets.

Bake for 11 to 15 minutes, rotating the sheets from top to bottom and front to back after 7 minutes. The cookies should be golden and just firm around the edges. Lift the cookies onto cooling racks with a wide metal spatula - they'll firm as they cool.
Posted by Picasa

Thursday, November 13, 2008

Easy Banana Roll Ups

Forgive me for my drool. These little wraps may not look all that impressive, but man are they good. They are closely derived from a recipe I learned back in highschool. One of my good friend's dad ran a BBQ biz on the side, and one day he needed some extra help, so my friends and I became day labor. I learned so much that day from how to make rocking, fresh cut french fries, a seafood boil and these lovely wraps. At the BBQ I think we used hershey bars instead of chocolate chips, and we did them on a griddle type surface, but the yumminess from that day stuck with me.
These could NOT be easier. 4 ingredients (3 if you don't count the cooking spray). About 5 minutes of work. Easy Peasy and so great tasting. The Boy loves these, which makes me happy because they are a way to sneak a banana into a less than vitamin filled diet.
Easy Banana Roll Ups
2 servings

1 large banana
2 handfuls chocolate chips
1 large or 2 small flour tortillas
cooking spray

1. Slice bananas on a diagonal. Lay banana slices in an even line about 1/3 of the way into the tortilla (like you would for a burrito or taco). Sprinkle the chocolate chips on top. Roll like a burrito ( fold in the top and bottom and then roll sideways).
2. Heat a skillet to medium, medium high. Spray with the cooking spray. Add the roll up, seam side down. Cook a minute or 2, until golden brown. Turn and repeat until browned all over and chocolate has melted.

Thursday, November 6, 2008

Blueberry Muffins


If you are like some of my dear friends and you don't like the romantic stuff, I suggest just skipping to the bottom for the recipe (it's worth it!). These muffins were a gift. For the boy. For...our four year anniversary...FOUR YEARS. Take that in for a moment. You may be shocked at the dating for four years part, but I think most people are shocked by the fact that my gift to him for the occasion was... a pan of blueberry muffins?
But it was more than blueberry muffins. The weekend before, he had been over at my place, and, as is the norm, Food Network was on in the background. It was some Paula Deen special and she was making blueberry muffins. The boy started drooling and commenting about how he hadn't had blueberry muffins in ages and how he used to love them.

And, while we had agreed not to get each other gifts (paying an obscene amount for school each year takes a toll on your wallet), I could not help but whip up a batch to show him that I cared. Cue the sappy music.
His reaction? He loved them. He devoured them. My reaction? I'll just keep 2 of them for myself, he'll never realize it was a batch of 16 ;)

They really were good. I decided to hold back a handful of the berries when mixing and then top each muffin with a few so that some stayed at the very top to make them pretty. And they were both pretty and delicious.

Blueberry Muffins

Ingredients

12 tablespoons (1 1/2 sticks) unsalted butter, at room temperature
1 1/2 cups sugar
3 extra-large eggs, at room temperature
1 1/2 teaspoons vanilla extract
1 cup plain yogurt
1/4 cup milk
2 1/2 cups all-purpose flour
2 teaspoons baking powder
1/2 teaspoon baking soda
scant 1/2 teaspoon salt
2 cups frozen blueberries

Directions

1. Preheat the oven to 350 degrees F. Place 16 paper liners in muffin pans.

2. Cream the butter and sugar until light and fluffy, about 5 minutes. Add the eggs 1 at a time, then add the vanilla, yogurt, and milk.

3. In a separate bowl, combine the flour, baking powder, baking soda, and salt. Add the flour mixture to the batter and beat until just mixed. Fold in all but a handful of the blueberries with a spatula and be sure the batter is completely mixed.

4. Scoop the batter into the prepared muffin pans, filling each cup just over the top. Sprinkle the remaining berries on top and bake for 25 to 30 minutes, until the muffins are lightly browned on top and a cake tester comes out clean.


Sunday, November 2, 2008

Apple Dumplings

Ok, so I admit the ingredients in this one sound a little weird. Ok, more than a LITTLE weird. Sprite? Crescent rolls? Oh what did I get my self into? But I first saw a version of this recipe over on Pioneer Woman Cooks, and then Rachaelf Ray mag had another version, so I HAD to try it. Wow...it was actully pretty good. More than pretty good, it was great. Not great for my arteries, but that's what the run the next afternoon is for. So enjoy it, but make it up to your heart later.
Despite the odd list of ingredients, these babies end up sweet and tender, not at all sour like the sprite/mountain dew would suggest. The apples tenderize and are covered in what becomes an almost apple flavored caramel sauce. Definately worth a try!

Apple Dumplings
flour for dusting
1 can (of 8) crescent rolls
1 large apple cut into 8 wedges
1 stick butter
3/4 cup brown sugar
1/2 tsp. cinnamon.
3/4 cup Mountain Dew (I used sprite because it was on hand. worked fine)

1. Preheat the oven to 350°. On a surface dusted with flour, unfold the rolls. Place an apple wedge on the wide edge of each piece of dough and roll up; place the dumplings in an 8-inch square baking dish.
2. In a saucepan, melt the butter with the sugar and cinnamon over medium heat; stir in the Mountain Dew. Pour the mixture on the dumplings. Cover with foil and bake for 15 minutes; remove the foil and bake 15 minutes longer.

Friday, October 31, 2008

Mexican Baked Potatoes


Look how cute these are! They are like twice baked potatoes, Mexican style! Love it! While these were not "quick" (baked potatoes never are), they were REALLLY easy and very good. Because I use vegetarian fat-free refried beans, I don't think these are too unhealthy either. All in all, I would call these babies a success!
I used refried black beans this time, but I don't like the dark color it gave the inside, so if I were serving these to guests, I would probably use normal refried beans so that it was more of a brown and less of a burnt looking black. Then again, I always love the taste of black beans, so who knows, maybe I'll stick with it.

Oh, but about the vegetarian fat free refired beans? Come on, they are so much better for your arteries and still taste just as good. I feel fine eating them since the 2nd ingredient isnt "lard." Heeby Jeebies to that one.
I am entering this recipe into My legume love affair. Check out here and here for details if you are interested in entering.
Mexican Baked Potatoes
4 large russet potatoes, washed
3/4 cup vegetarian fat-free refried beans
2 scallions (white and green parts), thinly sliced
1 Tbsp taco seasoning
salt & pepper to taste
3/4 cup mild or medium salsa
1 cup shredded Mexican cheese
sour cream and/or guacamole (optional)

1. Preheat the oven to 450 degrees F. Prick the potatoes with a fork and bake in the center of the oven for 1 hour, or until tender. Reduce the heat to 375 degrees F and let the potatoes cool at room temperature for about 15 minutes before handling.
2. When the potatoes are cool enough to handle, cut in half lengthwise and scoop out the potato pulp, transferring to a small bowl and leaving a shell about 1/4 inch thick. Add the refried beans, scallions, taco seasoning, salt and pepper to the potato pulp; mash well to thoroughly blend. Stuff the mixture back into the potato halves and transfer to an ungreased baking sheet. (potatoes can be covered with plastic wrap and refrigerated for 24 hours before continuing)
3. Top each potato half with about 1 1/2 Tbsp of salsa. Bake in the center of the oven, about 15 minutes (about 20 minutes if they have been refrigerated), or until heated through. Sprinkle each half with 2 Tbsp of the cheese. Return to oven and bake until the cheese is melted, about 5 minutes. Serve at once, with the toppings (if using).

Monday, October 27, 2008

Penne with Butternut Squash Cream Sauce

I am so hungry right now. I was already hungry before I started typing because my lunch was tiny, but then add in that I am looking at pictures of this REALLY good dinner from last week and I am positively drooling. Please forgive me while I salivate at the screen. Last week I saw the recipe for pumpkin cream sauce on penne in Rachael Ray, but not liking pumpkin much I immediately switched to Butternut squash and never looked back. The nutty and almost sweet roasted butternut squash with the cream...oooh and cheese. So good! And, it was even better the next day because a lot of the sauce was absorbed by the pasta, so it was all flavored with the butternut squash. It was just very good and very rich and filling. And really not that bad for you (ok, I know it has cream and cheese, but still, all that squash!)

I am submitting this dish to Celebrate Autumn: AYE.
Penne with Butternut Squash Cream Sauce (Adapted from Rachael Ray)
1 lb penne or ziti pasta
2lb butternut squash
2 TBSP butter
1 onion, chopped
salt and pepper (crucial, do not skimp)
1 cup half and half
1/2 cup parmesan plus more to top
parsley
1. Preheat oven to 400. Cut squash in half lengthwise. Scoop out the seeds. Place cut side down on a roasting sheet and roast about 45 min until tender. When done, let cool slightly. Once cool enough to handle, remove any dark areas from the cut edge, then spoon the rest of the flesh into a bowl. Puree with your handy dandy imersion blender (or in a regular blender) until smooth.
2. In a large pot of boiling, salted water, cook the pasta until al dente. Drain, reserving 1/4 cup pasta cooking water.
3. Meanwhile, in another large pot or pan, melt the butter over medium-low heat. Add the onion and season with salt and pepper (remember, do not skimp!) ; cook, stirring, until softened, about 6 minutes. Stir in the squash and half and half and bring to a boil. Mix in the pasta and the reserved pasta cooking water. Stir in the parmesan; season with salt and pepper.
4. Serve. Top the pasta with the parsley and more parmesan.